|
Creating a fixed ratio image |
||||||||
| Getting your picture the exact size you want can be frustrating, mainly because Photoshop has several ways of doing this. The normal thing for most of us to do is to use the rectangle marque and select the portion of the image we want then go to the image menu, select crop and the deed is done. Though this will create an image that looks best we are faced with the issue of getting that image into the proportions we want for the print job we are working upon. Below, is an example and how we go about cropping and then how we can proportionally crop. | ||||||||
|
|
||||||||
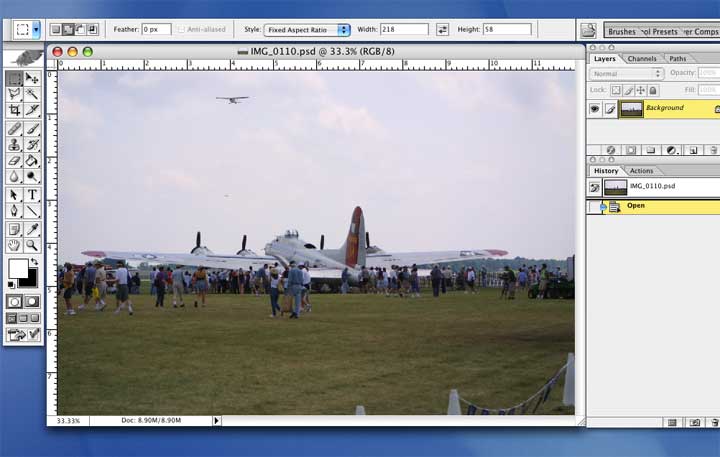
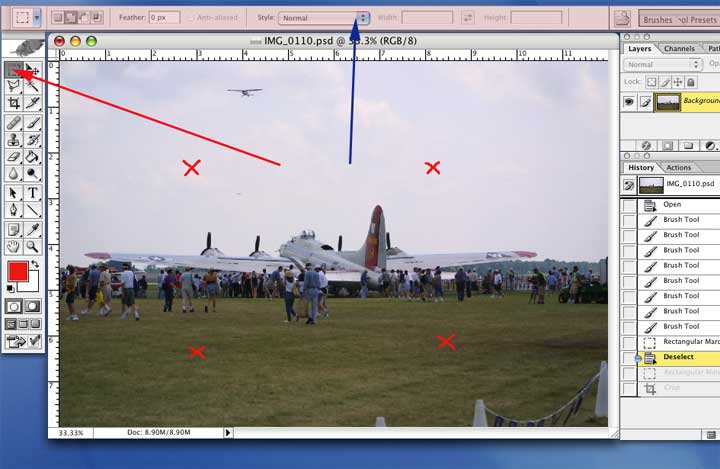
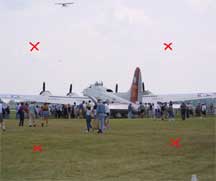 In this picture let us take the fuselage and four engines of the B-17 and make the picture we want to use. Our plan is to print the picture on 4 x 6 inch paper and have the image fit perfectly. So what we want is roughly the area within the four red "Xs" I have drawn on a separate layer of the image so we can sort of visualise how our picture will look. Now we can go ahead and make the selection and crop. Click on the marque tool (I have a red arrow below pointing to the marque tool). The next step is to go to the option menu which should be across the top of your screen, I have given it a pink colour just to show you what I am talking about. If it isn't visible go to the "Windows" menu and click on "Options." Note that the items on the Options menu are changed with whatever tool you have selected. With the Marque tool selected the little pull down menu (blue arrow) is visible. It is normally set to "Normal" which means that how ever you select the part of the picture with the marque tool it will do as it is told. |
||||||||
|
|
||||||||
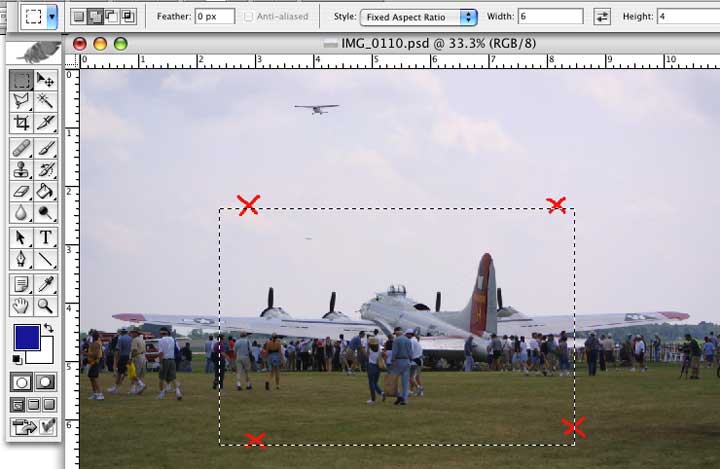
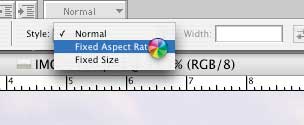 As you can see on the left the pull down menu is exposed and I have selected "Fixed Aspect Ratio". When I let go of the mouse button the width and height windows light up and I can type in the exact ratio I want. In this case I will put in "6" in the width window and "4" in the height window. But I could just as easily put in "432" and "288". Now when I use the Marque tool it will only select an area of that proportion. Below is the example with the fixed aspect ratio set at 6 x 4 and I have drawn the marque around the portion of the image I want. |
||||||||
|
|
||||||||
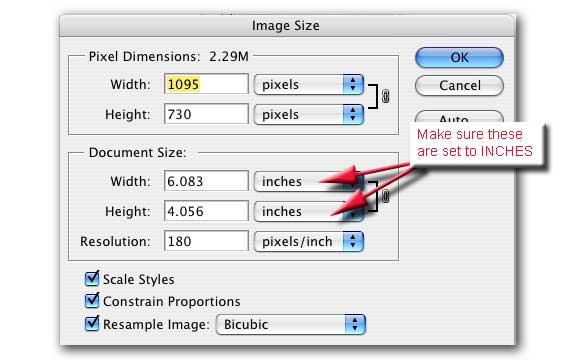
| But alas we are not done. First go to the "Image" menu and click on "Crop" this will reduce the image to the selected area. The next thing is then to go back to the "Image" menu and click on "Image Size" and the menu below will appear. | ||||||||
|
|
||||||||
| In my example the selected area turned out to be pretty close to the actual six inches by four inches picture but that was just luck. Making sure that the two buttons with the arrows pointing to them are set in "inches" type in "6" in width and "4" in height. With the constrain proportions clicked you only need to do one and the other will be altered correctly. Now save your picture but remember to save it by a unique name otherwise you will wipe out the original. | ||||||||
|
|
||||||||